SKU:VTTSUNSHA-ST-EE-W
MSI
MSI – Shorecliffs™ Sunny Shake Stair Tread Eased Edge Wrapped 47"
💳 We offer flexible financing options through trusted partners — learn more here .
Couldn't load pickup availability
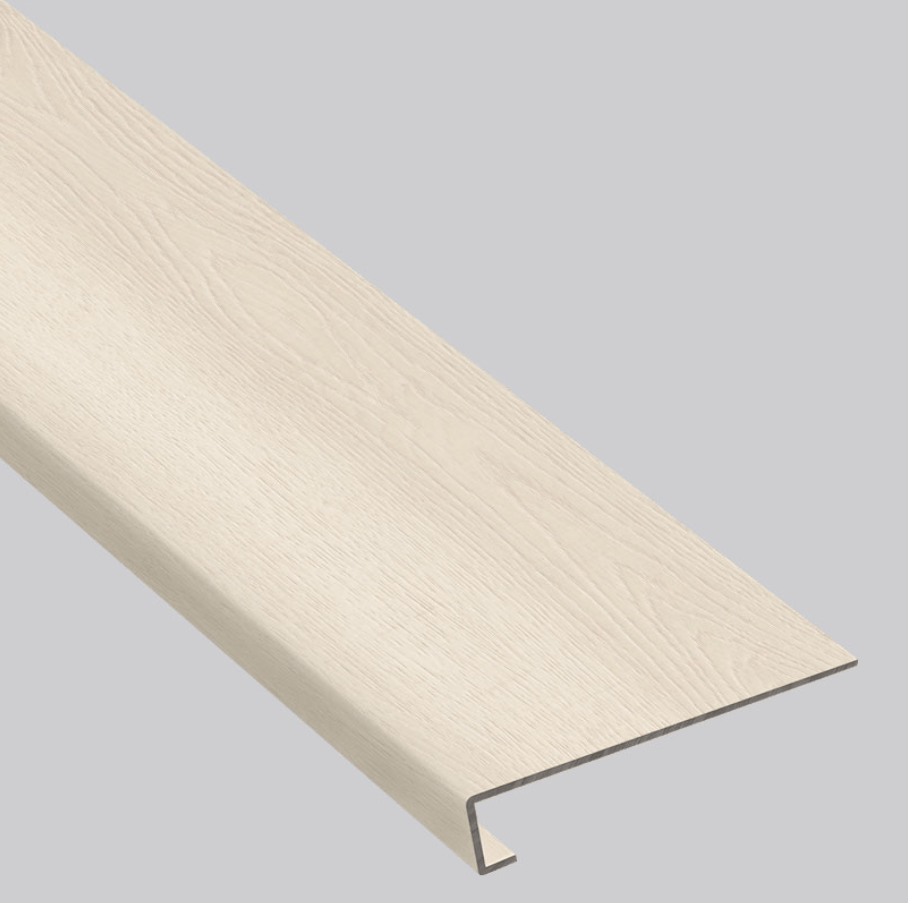
Seamless Stair Style Made Simple
Finish your stairs with MSI Stair Tread Eased Edge Wrapped, designed to match select MSI luxury vinyl flooring collections.
The rigid core construction and pre-attached stair nose create a clean, seamless look while delivering dependable durability for everyday use.
Its wrapped design installs easily with glue-down application, helping installers save time without removing the existing stair nose.
The result is a professional, polished stair finish that complements modern homes and light commercial spaces.
Key Features
- Durable Rigid Core
- Glue-Down Installation
- Pre-Attached Nosing
- Wrapped Stair Tread Design
Share
Product Specifications
Warranty
Warranty
Care & Maintenance
Care & Maintenance
Maintenance, Tips, and Warnings
- Dust-mop or broom can be used for daily maintenance. When necessary, clean with a MOIST cloth or mop and a neutral PH cleaner – heavy use of detergent cleaners will leave a residue and, over time, lead to a cloudy film.
- NEVER USE floor polish or floor cleaning wax, oil soaps, etc. These products can damage and/or leave a film on the flooring.
Guides
Guides
RIGID CORE STAIR TREAD EASED EDGE WRAPPED
Required Tools:
- Vacuum
- Finishing nailer
- Safety glasses
- Work gloves
- Measuring tape
- Painters
- Tape
- Scraper
- Urethane construction adhesive
- Caulk Gun
- Table/Circular Saw
- Tread Tool (Optional)
Installing your Stair Tread
- Remove any existing flooring materials such as carpet, staples, adhesives, or debris from stairs.
- Ensure each stair tread surface is clean, flat and dry.
- Starting at the bottom step, measure the width and depth of the stair using a tape measure or angle finder.
- Measure and cut each tread separately as stair sizes may vary.
- If steps are not square, use a tread tool or angle finder for accurate angles.
- Using a table saw or circular saw, cut the tread to the required size with the decor side facing up. (Applying painter’s tape along the cut line can help prevent edge chipping during cutting.)
- Dry fit the tread on the step to confirm proper sizing before adhesive application.
- Apply a ¼" bead of urethane construction adhesive approximately 1" from the edges using a serpentine pattern spaced about 1.5" apart.
- Apply additional adhesive inside the bullnose area of the stair tread to ensure a secure bond.
- Position the tread on the step approximately 1” away from the riser, then slide it firmly into place against the riser.
- Apply firm pressure across the surface of the stair tread to ensure proper adhesion.
- Follow the adhesive manufacturer's application and curing guidelines.
- Secure the tread along the back edge near the riser using finishing nails placed ½” from the riser and spaced approximately 10–12” apart to prevent movement while adhesive cures.
Note* Remove any excess adhesive immediately and allow sufficient drying time as recommended
by the adhesive manufacturer before using the stairs.
Color Disclaimer
Color Disclaimer
While online swatches and showroom visits are great for initial exploration, nailing the perfect flooring color requires a closer look. To guarantee your satisfaction, we highly recommend ordering a sample directly from us or the manufacturer.
Even with samples, keep in mind that they might not be an exact replica of the final product due to slight variations in production runs. This means the shade could differ slightly if the materials were made at different times.
If you're installing the flooring in a single, large space, like a living room or hallway, it's crucial to be extra cautious. Slight shade variations between production batches can become noticeable when laid out together.
To ensure a seamless look, we recommend purchasing enough flooring to cover the entire space, plus an additional 10% for waste. This buffer allows you to select pieces from the same production batch, minimizing the risk of color inconsistencies.
